
Do you own a computer that regularly frustrates you due to its slow blazing speed? Are you used to such speeds or do you need a new machine to replace the slow running option? Don’t waste money investing in a new machine, the Xtra devices are the solution to your slow-running computer. But how do you install these devices to give you blazing results?
Now, if you need to learn about installing these devices, this is your guiding platform. Our presentation entails the steps involved to install these devices to enhance the performance of a pc. Moreover, readers shall understand how to connect their Xtra devices to both wired and wireless networks. Maintain the tune to understand the whole process.
How Do I Install Xtra PC on My PC?
Most people get themselves into purchasing new machines once they note their originals aren't performing better. Even though this sounds like a diligent solution, there exist other possible ways to do it. Xtra PC devices can save you from spending the large amount you would have spent to purchase newer devices. These devices can improve the speed of your PC double from the original rate.
However, after purchasing these devices, we find another stamp ahead of us. Installing the Xtra devices will only be a breeze if you have ideas about it. Before we learn the process, it's right we understand that all applications get installed directly to the USB device. Doing it to other storage devices will not give any impact on the overall results. Let’s comprehend the steps involved to install Xtra PC on PCs.
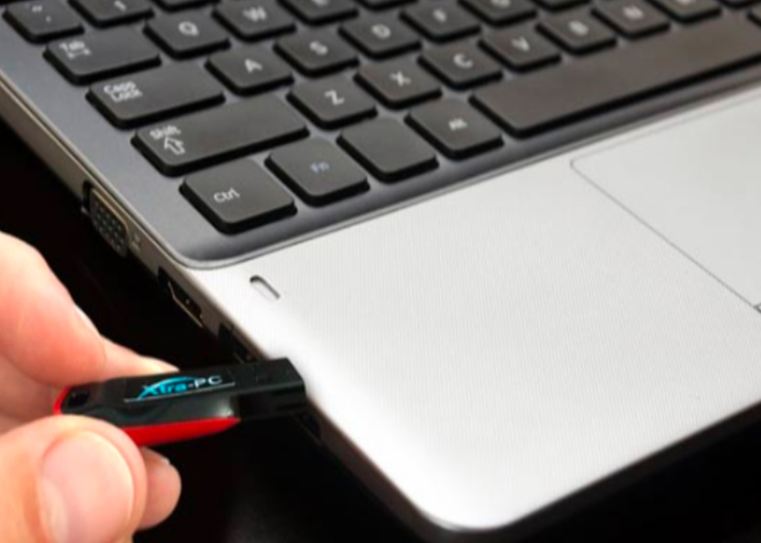
Step One
Installing the Xtra PC starts by inserting this device into one of your computer’s USB ports. Immediately follow to reboot your computer. Usually, the process will go faster depending on the capabilities of your Xtra-PC device. However, in other situations, the computer will load at its original pace.
If the loading pace maintains the original computer speed, then get a step of changing the PC settings. Changes in your computer setting will enable booting to take place from the Xtra USB. User manuals contain all information regarding setting changes to restart the computer from the Xtra drive.
Step Two
The next stage the computer prompts you after booting is entering the administrator account password. Under the agreement licensing information, there is a box you will check to ascertain acceptance of terms. Complete this stage by clicking the OK button to proceed to the next level.
It will take some time, a few moments to get directed to the Xtra PC login screen. Here, input the word administrator as your username and the password you entered the first time. If you enter invalid credentials, it will prompt you to try again. After filling in the right details, then a welcome screen will prompt.
Step Three
At this stage, you are going to connect to a network to proceed to the next installation stages. We have both the wired and wireless options to connect, the choice depends on the installer. Let’s get a reader through connecting to a wireless network.
Find the network icon on your computer, you will get it at the bottom right corner of the PC. Left-click on it and a menu shall pop up where you will select the name of your wireless network. If still, the computer hasn’t registered your network, then confirm it’s open and refresh it.
Once registered, left-click the network and a prompt requesting you to enter the network password will come up. Enter the right credentials and it will take a while to screen them before completing the connection process. A confirmation message will pop up to notify you of the accepted credentials and is now connected to the network.
Step Four
After creating a connection to a network, you can proceed with the process by clicking continue. Here, you will get redirected to a third-party software wizard, just click continue to proceed with the installation process. Your next screen will display the first step of the application installer where you click on the installation option.
Before the installation process, there are other information installers should read through before they proceed. Moreover, you are required to accept the EULA licensing agreement to get further with the installation. Simply check the box below the agreement and click OK.
Installation shall start immediately and here the LXTerminal window will show up as the installation continues. As the installation goes on, you will get directed to accept the EULA Microsoft TrueType core font’s terms. Scroll down the options using the tab button to the OK prompt and finally YES.
Expect pauses in between the installation process, never click anywhere and just give the processing time to continue. Also, after accepting the Microsoft TrueType terms, there is nothing again you will do at the LXTerminal window. Usually, the installation takes around ten minutes to complete. However, the overall time taken will depend greatly on your computer’s speed.
Step Five
After completing stage one of two, the Pipelight installer will prompt up as your step two of two. Don’t wait for anything, just click install to commence the installation process. The second step will take between ten and fifteen minutes to complete. The overall time taken will depend on your computer speed.
During the Pipelight installation stage, there are a lot of commands and windows as well that will appear. These are for instance the LXTerminal window, the Chromium web browser, and many other messages. Here, you shall ignore everything and simply wait until the computer completes the installation task. Upon completion, a web browser shall pop out which you just close and the installation process is completed.
Conclusion
Xtra PC USB devices are great inventions computer owners should never underestimate whatsoever. They save coins people might struggle searching to acquire replacements to their PCs. People have tried these devices and ascertained they are worthy to purchase.
We have given reader information on how to install the Xtra USB devices on our computers. You need to undertake the process keenly for it to work out for you. Follow our guide ideas and test the effectiveness of the Xtra PC devices.